Pure gold is discovered every day in coolers and fish boxes around the world. While people have been catching tasty tuna forever, there is something of an awakening taking place. And yes, the sashimi revolution is absolutely transforming our collective approach to bluefin, yellowfin and bigeye tuna preparation.
Led by chef-fishermen and hybrid watermen of other ilk, recreational sport fishermen are also discovering what world-class restaurants have known for a while: Fresh-caught tuna—the ones you catch, harvest and process yourself—is a delicacy that rivals dry-aged wagyu, caviar or any other vision of savory perfection.
To help you transform your next tuna loin into the perfect plate of sashimi, we have profiled two of the best in the business. The secrets they share do not involve any covert ingredients or specialized chef skills taught in culinary school. The real secret to the perfect sashimi plate, rather, starts with how you care for your fish and what happens immediately after it’s harvested.
Watch: We show you how to make yellowfin sushi nigiri, step by step.
Lesson No. 1: Let it Rest
Chef Cosmo Goss is something of a titan in the culinary world—and he’s also a fisherman. After a restaurant career that spanned New York, Chicago, Southern California and Mexico, Goss launched a successful culinary-consulting business. He is the chef for Bubba, works with Costa Rica’s Zancudo Lodge, and counts among his clients a number of fine-dining and hotel establishments.
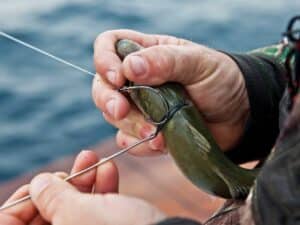
The belief that the fresher the fish, the better it will taste drives many to process and eat their tuna as quickly as possible. But Goss is a proponent of a different approach, stressing the benefit of allowing the fish to rest on ice before cleaning it. “I recommend keeping the fish on ice until it goes through rigor mortis,” he says. Rigor mortis, or postmortem rigidity, is the process of muscle and joint stiffening that occurs after death. It begins to happen once an organism ceases aerobic respiration. When alive, oxygen is required for the process by which muscles relax, but when a fish dies—and its body no longer processes oxygen—its muscles tighten and it enters the state of rigor mortis.
Goss also provides some tips for its harvest: “Once you gaff the fish, keep it as calm as possible. I like to break a gill and cut its tail so that blood pumps out of both ends. Once the fish is dead, gut it immediately and remove its gills. Pack the body with ice and let it rest for 24 hours—or at least until it has gone through rigor mortis. You’ll know the fish is ready to prep when it is pliable again. Not only will the flesh be cleaner and more tender, but it will also be easier to fillet.”
Goss says that cutting into the tuna before it has completed rigor mortis can result in tough, chewy or pasty fish. So just by waiting it out, you’ll have a world of difference in both texture and taste. Letting the fish rest on ice performs the same basic function as dry-aging steaks. In each case, muscle fibers break down and become much more tender. Be it a side of beef or a plug of tuna, the process also enriches flavor.
Lesson No. 2: Take Care and Get It Cold
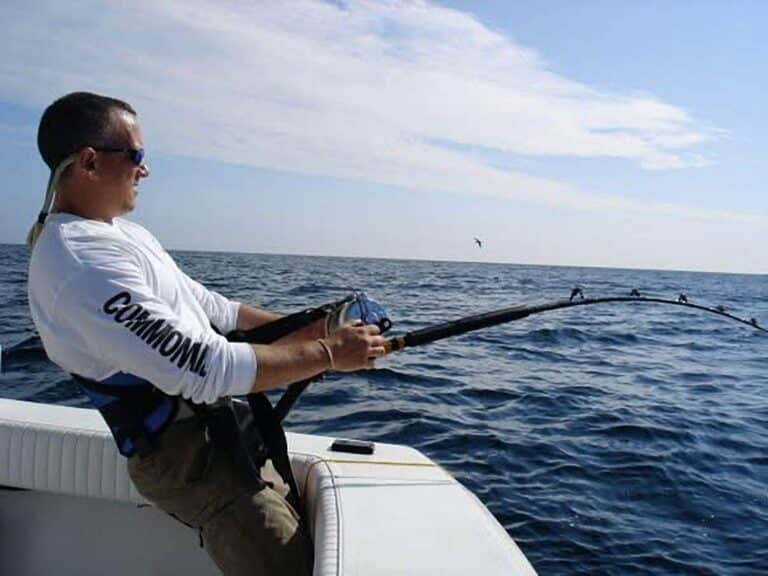
Ryan Griffin is a hybrid waterman who can do just about everything on a boat. Equal parts chef, licensed captain, crewman and photographer, Griffin makes a career freelancing on private boats. When we caught up with him, he had just completed a three-day Baja trip with Capt. Jeff Richardson on the 87-foot Weaver Cowboy.
“Photography, cooking and fishing all go together,” Griffin says. A quick, 15-second scroll through his Instagram profile (@pacfighter) is all it takes to conclude that he is an expert at turning fish into masterful works of art. Griffin says that a perfect sashimi starts with catching the fish, and once it’s on deck, he makes processing it his No. 1 priority.
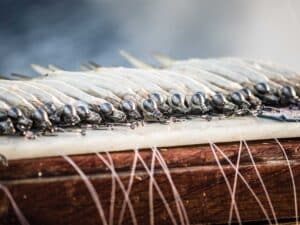
As soon as it comes out of the water, you want to kill the fish quickly, then gill and gut it immediately, making sure you don’t drop or bruise the fish. “You want to remove as much of the blood around the gills as you can,” Griffin says. He also takes the time to thoroughly scrub the slime off the body with a brush before it goes into the ice. Removing the slime and blood at this stage will keep it from getting onto the meat later in the cleaning process. These contaminants can not only affect the flavor, but they can also shorten the shelf life of your prized tuna.
“From there, immediately plunge the fish into a saltwater brine. The temperature of the brine will be anywhere from 32 to 36 degrees F. The next day, cut and process the fish,” Griffin says.
Griffin explains his brining method: First, cover the bottom of the cooler or fish box in a layer of crushed ice. Next, place the scrubbed, gilled and gutted tuna on top of the ice foundation, its body cavity packed with crushed ice. Then cover the fish with more crushed ice. After that, pour two 5-gallon buckets of salt water over the fish and ice. “You want enough ice to cover the fish and its cavities—enough ice to keep the fish from getting beat up while you’re running—but also not so much water that the fish sloshes around. During the course of the trip, and as we add more fish, we’ll shuffle them around, add more ice, and add or remove water, as needed,” he says.
“People tend not to take enough time to care for the fish at the beginning of the process,” Griffin continues, “and it does take a lot of extra work to get the fish cold and clean right out of the gate.”
Read Next: Everyone needs a few good knives for fishing. Here are our top choices.
Lesson No. 3: The Right Cut
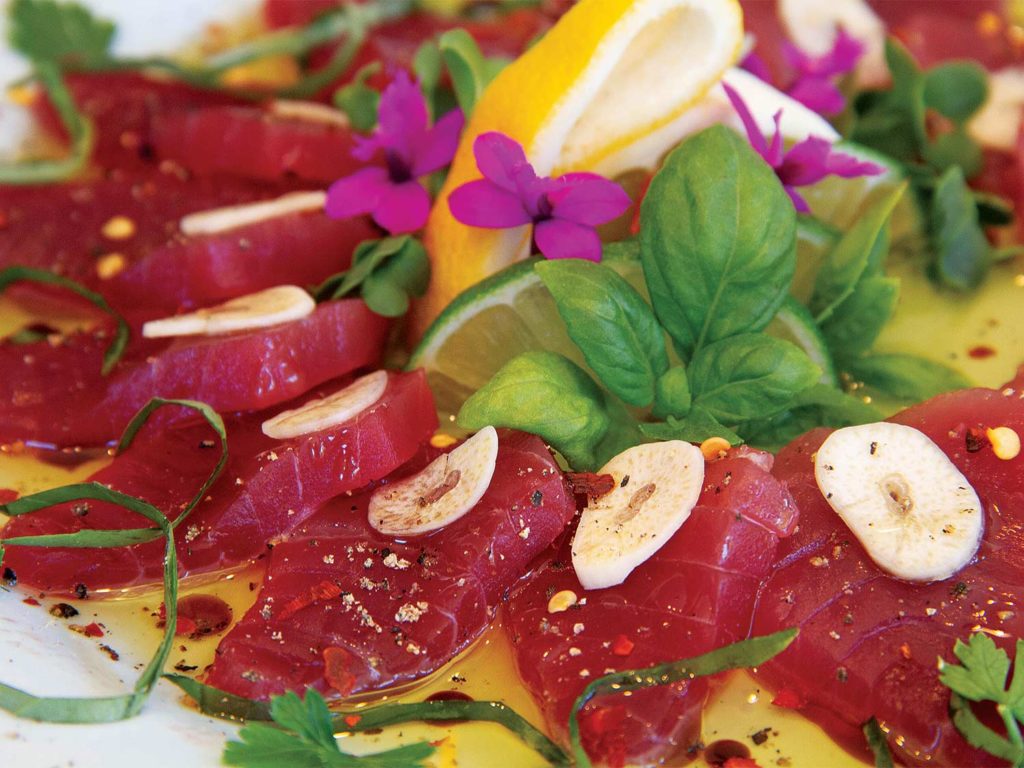
Presentation goes a long way in preparing the perfect sashimi plate. “I like to use the loins, or if the fish is bigger than 80 pounds, the belly,” Goss explains. “As for portions, pieces should be between ⅛- and ¼-inch thick and about 1½-by-1½ inches in diameter. Ponzu sauce is a great choice for sashimi; I like to combine soy sauce, citrus, sugar, vinegar and jalapeños for kick.”
Griffin likes the top (dorsal) loins for his sashimi dishes. “Whenever we are processing the fish for sashimi, we’ll cherry-pick pieces of the top loin closer to the head and shoulders.” Portions from this area of the fish will be rounder and not as stringy as the areas closer to the tail.
Griffin encourages people to try their own sashimi-platter iterations. “Cold, fresh ingredients are key. Add your own spin with things like texture, acidity and saltiness, or just enjoy it simply—you really can’t do anything wrong.”
Correctly harvested tuna truly is a blank canvas when it comes to your own culinary ventures and tastes, so tight lines and buon appetito!
Ryan Griffin shares his take on Tonno Crudo (raw tuna)
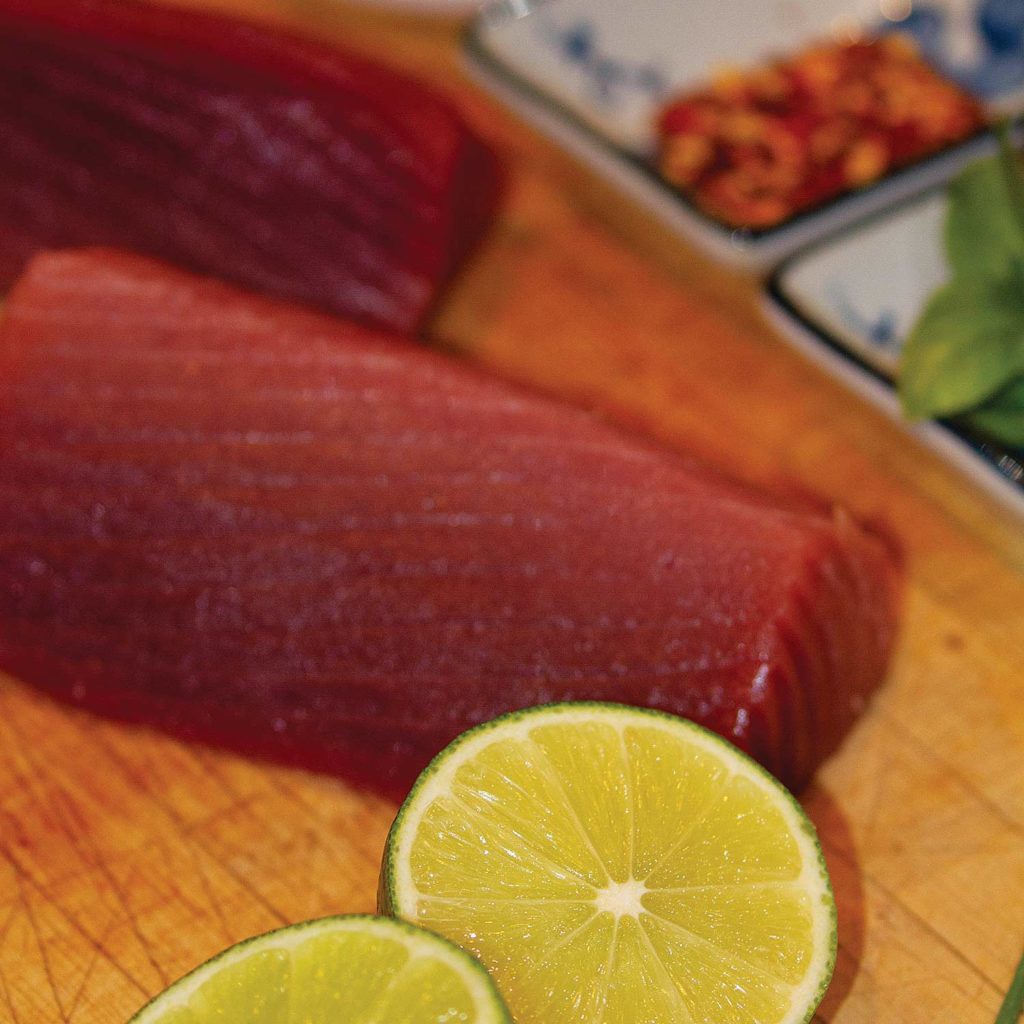
- Squeeze fresh lime juice on a large serving platter.
- Pour extra-virgin olive oil over the lime juice.
- Fan out the cut tuna on top of the oil.
- Sprinkle the fish with fresh-cracked black pepper and red pepper flakes, fresh basil, and finely sliced garlic.
This article was originally published in the August/September issue of Marlin.