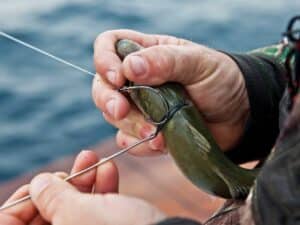
Many tournament crews use a Dacron loop attached to their main line to put into the outrigger or tag-line clip in order to protect the line from chafing. The loop is usually made by passing the Dacron through itself to create a loop, and then running the main line through the length of Dacron with the loop on the end.
One of the problems I’ve encountered is that after a few days of use, the Dacron starts to tear and the entire hanger usually needs to be replaced. To replace the hanger, the double line, wind-on leader and swivel must be removed and the main line cut back. To avoid having to do this, I’ve started doing a simple weave on my Dacron hangers and the loops at the top of my wind-on leaders. The wear is greatly reduced, and they last much longer. Here’s how you do it:
You need a 10-inch piece of Dacron the same weight as the main line; a 1-inch piece of mono (50-pound), melted smooth at both ends so it can be inserted into Dacron; wax (surf or lube wax); a needle splicing kit (looped and hollow needles); and a sharp cutter.
It might take a bit longer to make this hanger, but it saves time in the long run by lasting 10 times longer.
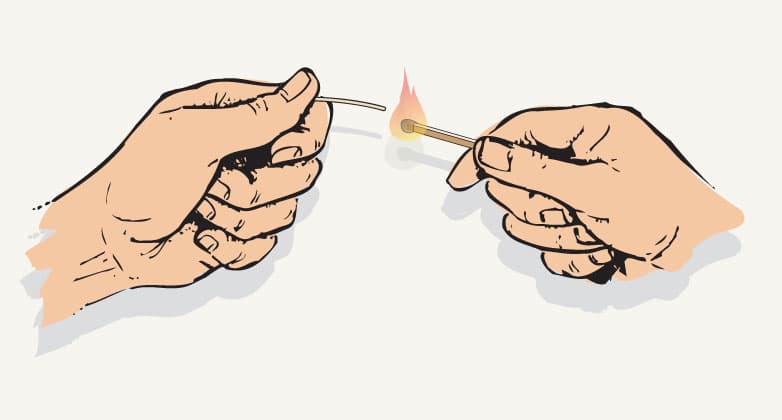
Start by melting both ends of the piece of 50-pound mono. The 1-inch piece matches the size of your loop. You want to keep the loop size as small as possible so it can’t hang up on the rod tip during battle. The mono insert helps keep the loop open, allowing you to get the line back into the clip quickly after a knockdown. Saving a few seconds in a tournament can make the difference between winning and losing!
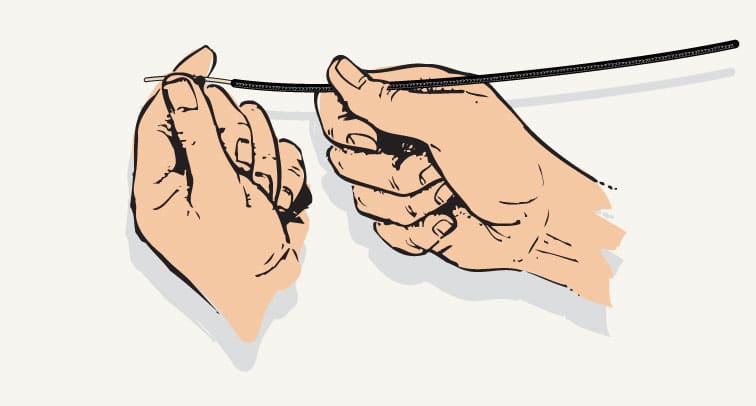
Insert the entire piece of mono into the 10-inch piece of Dacron about two-thirds of the way down.
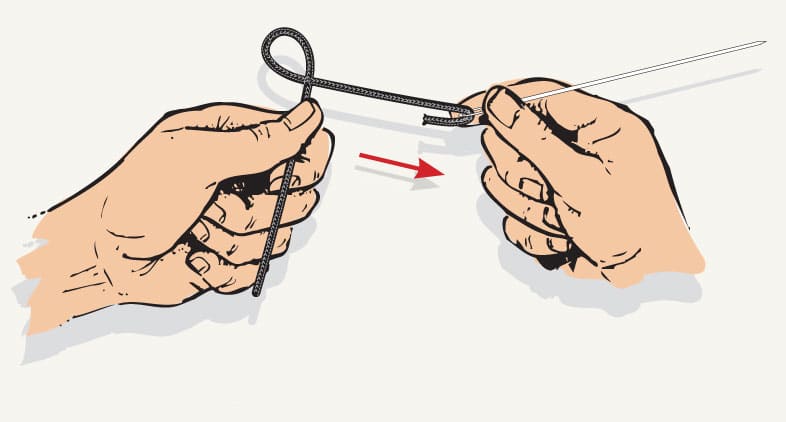
Using a looped-end splicing needle, create a loop by using both ends of the mono as a guide, again about two-thirds of the way down the Dacron. You do this by passing the loop of the needle through the Dacron, and then pulling it through itself. You will have a long and a short side on either end of the loop once the Dacron is pulled all the way through. The 1-inch piece of mono should be inside the Dacron loop.
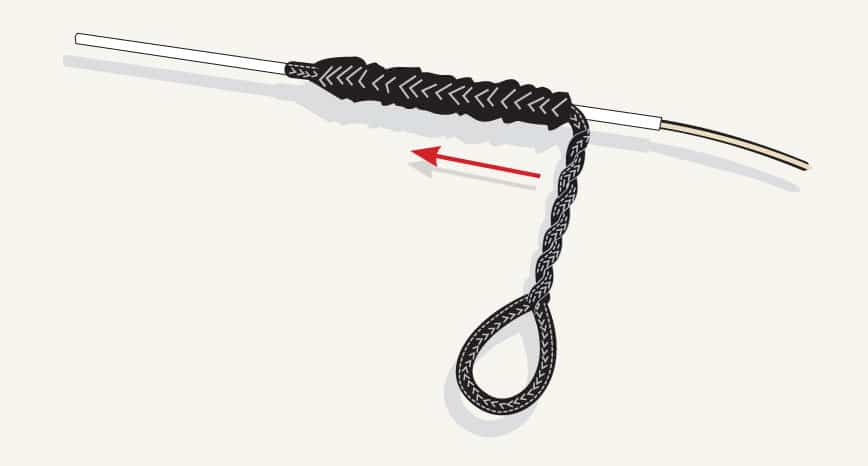
Start the braid by passing the loop end of the needle through the short piece of Dacron. Pull the longer piece through the shorter piece. Repeat six to eight times to achieve a smooth, flat braid.
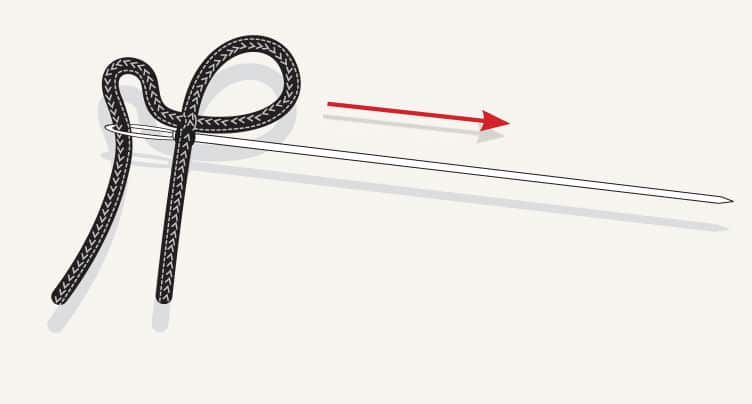
Your braid should look like this when close to completion.
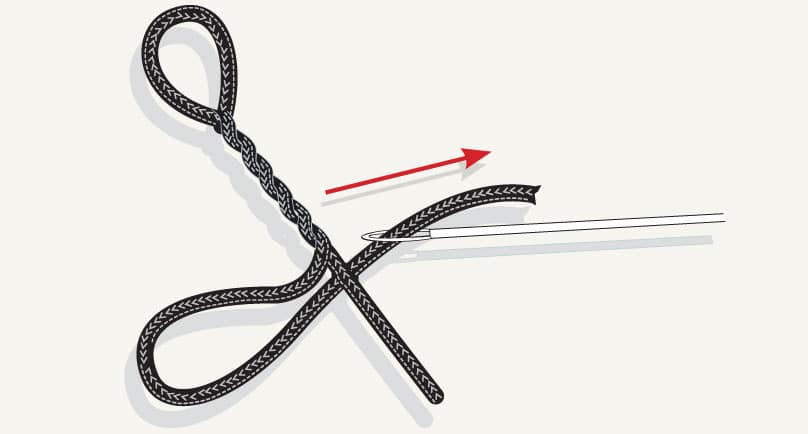
Insert the remaining tag end of Dacron into the loop of the needle. Then insert the needle into the remaining two-thirds of Dacron. Once the needle starts coming through the end of the Dacron, wax any frays. Melt the frayed end while the needle is still inserted.
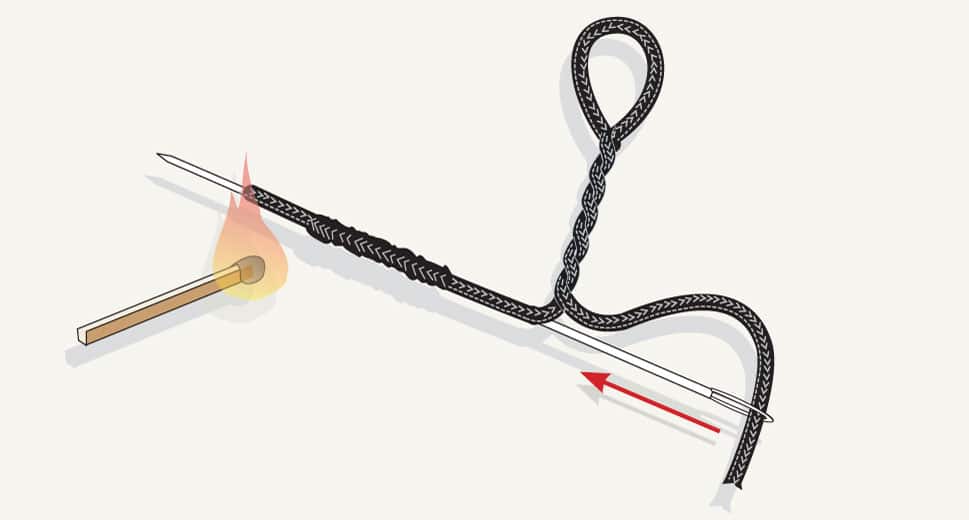
Insert the main line into a hollow needle that fits the main line diameter tightly. Insert the needle into the last braid that is running back into the hanger. Push the Dacron together and pull the needle and main line through the hanger.

Slide the hanger to the desired distance and floss in place.