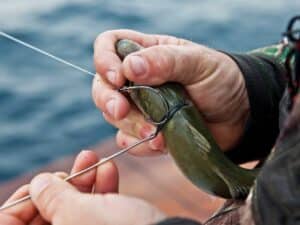
I’ve recently seen a number of pitch-bait tubes in your Tips & Techniques section, so I thought I’d share how I have taken the concept a step further. I fish from a 24-foot Sea Pro off Southern California, and one of the challenges I always have is getting a live bait, whether it be mackerel or bonito, into the water quickly. I have two bait wells on my boat, but they both have lids and center overflow tubes. If I place a live bait attached to a leader in one of the wells, the bait gets wrapped around the drain tube and the line gets chaffed by the lid.
I always wanted tuna tubes but couldn’t convince myself to spend the money – and due to the size and configuration of the boat I have, there’s limited room. And since I only use mackerel or medium-size bonito, most commercially available tuna tubes are larger than what I need.
I decided that I would create my own solution (with a goal of not spending more than $25 and using stuff found in my garage). I started with a 3-inch PVC pipe, using the slip joint end as the top and a cap for the bottom. The length of the tube is key, as is the fill rate, and through a bit of research I found that an 18-inch tube that fills in about 20 seconds works well for my needs. I made the mount from leftover 38-inch StarBoard from another project.
Inside the bottom of the tube, I put in a restrictor that slows the intake but doesn’t create too much of a bubbling effect. This tube is just like a small bait tank, and the mix of air and water needs to be just right. Too much water going in pushes the bait out, and too little will cause distress. Lots of bubbles kill the bait.
I tied the feed line into my existing 700 GPH system with a simple T-valve and a shut off for when the tube is not in use. I ran the water line out to the tube using a thru-hull fitting from the local marine hardware store. The other end connects to the cap using a 90-degree nylon fitting. I also put an o-ring on the inside to keep it watertight.
The cap is not glued on; instead, I use a small setscrew to keep the cap in place so it can be easily removed for cleaning.
I found the most difficult part of the whole operation was cutting the holes in the StarBoard. It took a number of tries to get them right, and I finally succumbed to making the holes undersized and sanding them to fit. The most expensive part of the project ended up being the eight stainless-steel hose clamps and the thru-hull fitting.
I did exceed my $25 budget, but the system works great. The bait calms down as soon as it enters the tube, and I’ve kept a mackerel nose-hooked in there for five hours prior to use. He was as lively coming out as when I put him in. It has been suggested that I should paint the inside of the tube black but I have not found the need.
Robert Gordon
San Diego, California