MAR0315_Electronics
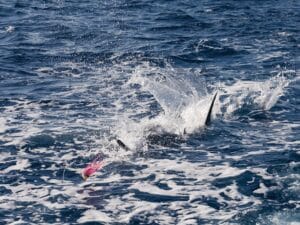
Bottom machines are a thing of the past. They got that name mainly because that’s what they were consistently capable of spotting: the bottom. The name lingers, but now, properly tuned sonar and side-scanning imaging give you a clear picture of individual baitfish in a pod and distinguish the billfish balling them up.
But getting your imaging equipment in tune to get the picture isn’t as automatic as bolting on a transducer and pulling a couple wires to the helm station. Add CHIRP, side-scan and standard sonar, run them all together and you could either have a sport-fishing deadeye ready to take on all tournament comers, or be nearsighted as a star-nosed mole.
And, as rapidly as technology improves, sport-fishers are on a nearly constant course to upgrading equipment to keep the competitive edge.
Transducer Foibles
Boatbuilders are increasingly savvy about finding the sweet spot for clean water flow on the boat’s bottom and locating transducers in it. Still, the most frequent cause of degraded imaging is turbulent water flow to the transducer. Most transducers get aimed at a vertical angle to the sea bottom. But angling a transducer forward slightly can improve flow by increasing water pressure.
Your installer will look for a place on the bottom of the boat that has the cleanest, bubble-free flow of water. With inboards, that gets tricky. Sometimes the best installation is through the hull and ahead of the running gear. Outboards and sterndrives more -easily -accommodate transom-mounted -transducers because the running gear lies behind them. Even so, a hook in the hull or a livewell pickup on the bottom can frustrate the best sonars.
Wide or Narrow
One of my favorite innovations of late is the transducer for the Raymarine CP 200 CHIRP SideVision sonar. It boasts two cigar-shaped transducers in a single bracket. Set screws allow the angler to rotate the tubular transducers inward for deeper water use or outward to tune the unit for shallower water. Big-game anglers have begun to see the value in a CHIRP side-scanning sonar that can scan not just the water under the boat, but far to the left and right as well.
Transducer cables should not be run in the same chase as other -electrical cables to avoid electromagnetic impulses and the diagonal lines across the sonar image that they cause.
Cross Talk
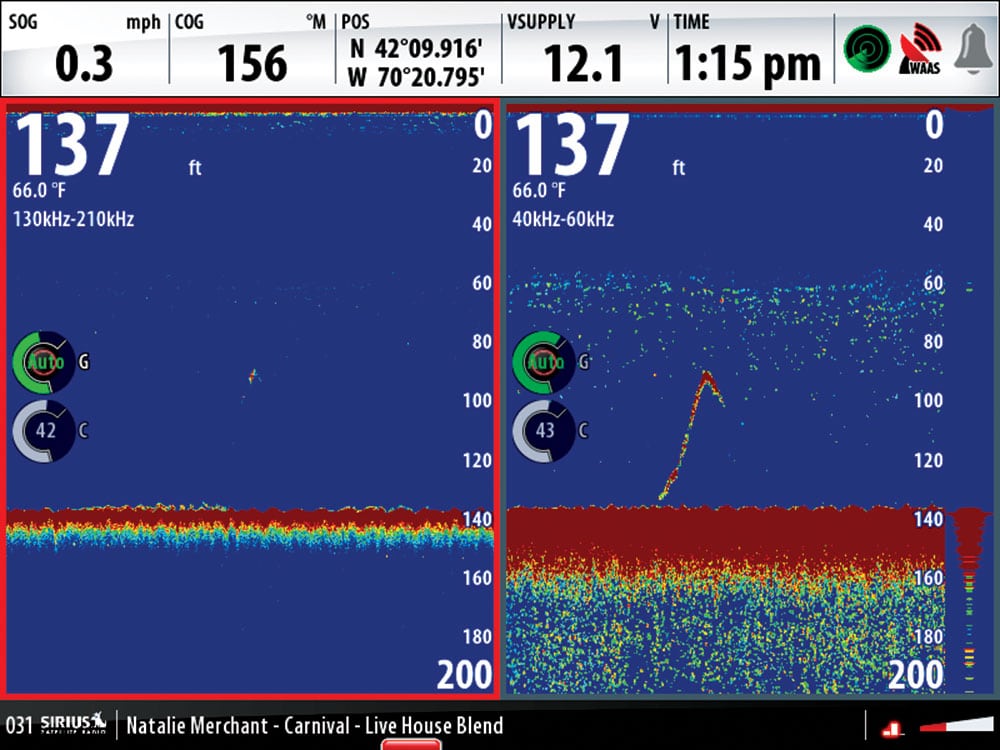
Cross talk occurs when the frequency of one transducer interferes with another. The symptoms are unclear images and vertical or diagonal bands across the image. This is not going to happen if you stick to a single brand because manufacturers make sure their equipment is compatible across side scanning, down scanning, CHIRP and standard sonar products. To eliminate or reduce cross talk between unrelated brands, make sure each transducer is set to a different frequency. A dual-frequency transducer transmitting at either 50 kHz or 200 kHz is fairly common on most sonars. CHIRP won’t cause problems with other sonars because the transducers commonly operate at much higher frequencies.

Tuning up
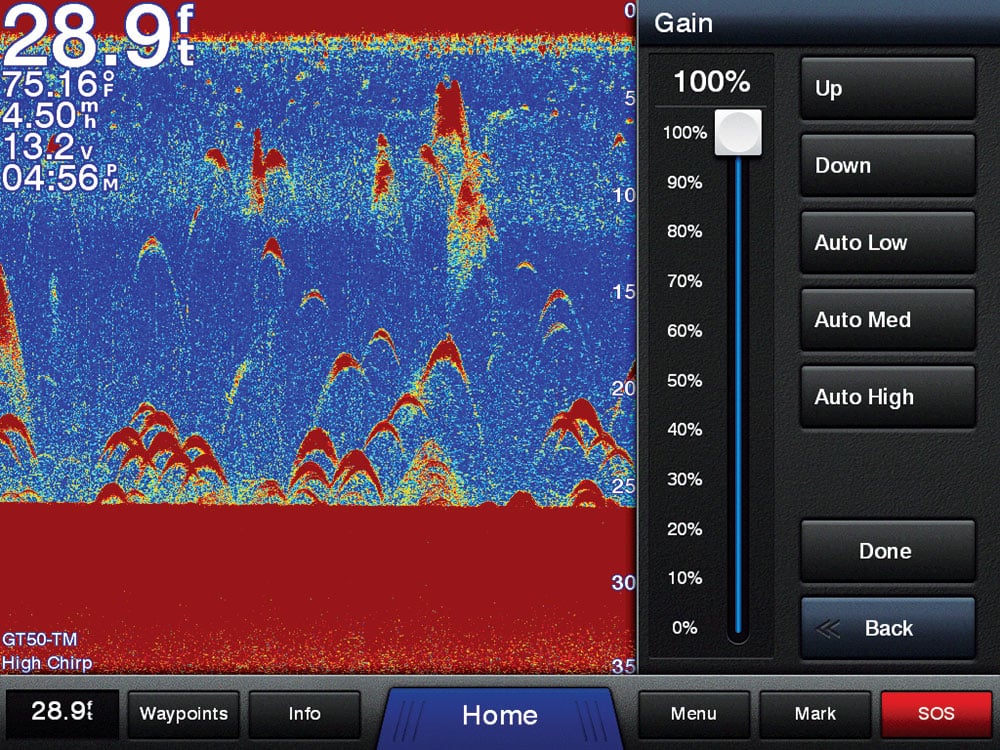
Many people turn on the sonar unit and let it run in auto mode. I often did that until I watched Stuart Woods of Navico tweak the image created by a BSM-3 Broadband Sounder Module. Stuart is an avid angler and while his tips of the day focused on bottom clarity, the same tactics are helpful in getting cleaner, crisper images of baitballs and the pelagics victimizing them.
So now that you know to turn off auto mode, what’s next? There are four things every angler should learn to fiddle with when looking for fish in deep water:
1. Gain: According to all experts, this is the most important adjustment anglers should dial up. Nearly everybody uses too little gain. Auto mode is pretty good nowadays, but you’ll still miss things. It’s like putting a pair of binoculars to your eyes and not focusing them. On a “noisy” setting, even the smaller returns will be striking.
2. Range For deepwater fishing, anglers often look for a thermocline and a high gain setting makes it easy to spot. Then, dial up your range to just below the thermocline. If your system has split screen, and most do, follow Stuart Woods’ advice: “I set the second range window to about 10 to 20 percent of the full range. Then I can slide the screen window up and down for a better look at a target I spotted in the full range.”
3. Noise Suppression: Many of the best skippers never use this. They believe it is better to have a bold target on a slightly noisy screen than miss much of the picture. If the targets are on the screen, experts agree, they’d rather be the ones doing the noise rejection with their eyes.
4. Screen Color: This is a personal choice, but by far the most popular background screen on a bright helm is white. Blue backgrounds offer the highest contrast in lower light when a white screen might impact night vision.
To CHIRP or Not to CHIRP?
If you follow the forums lately, there is a lot of chatter about CHIRP. The story goes that skippers accustomed to seeing a big, bold and nondescript target are reacting negatively to the finer, detailed individual targets. Why? Well, when you have your hands full on deck, managing crew and even customers, it’s harder to catch a refined image of a handful of separate fishes from the corner of your eye. Talk about throwing the baby out with the bath water.
Dual Imaging with CHIRP
Garmin was one of the first to offer a software solution to this unexpected reaction. They updated software to allow “echo stretch.” That’s the act of tuning out the detail, but, in the process, it makes the tiny, individual targets bolder and easier to catch from the corner of the eye.
The narrow cone angle of original CHIRP beams swept the water column with a pencil beam. New, wider-angle cones return the broader scanning capabilities expected from traditional cone angles to CHIRP but with added detail.
No single sonar solution is -correct for every angler or skipper. The bottom line is knowing what you want your -targets to look like and then setting up your equipment to get that picture.